In this article, we’ll guide you through step-by-step instructions on adding your own GIF Stickers to TikTok. Without further ado, let’s take full advantage of this feature for your videos to get viral on TikTok!
Step #1: Upload or Create Your Own GIF Stickers to GIPHY.com
GIPHY.com is a limitless source of GIFs and Stickers online. Also, it comes with a variety of clips, emojis, texts, and more. All of these elements have the mission to make your online interaction more friendly and attractive. Most importantly, GIPHY.com collaborates with TikTok, Facebook, Instagram, and other social media platforms. Hence, your GIF Stickers should be created or uploaded to GIPHY.com before adding them to TikTok. However, some of you may confuse GIFs with Stickers. Here is a brief explanation for these two definitions:
“GIF” is the shortcut of Graphics Interchange Format. Although they are displayed as small animations or video footage, GIFs are image sequences with lower quality.A sticker is a kind of GIF, so we can call it GIF Sticker. However, it has a transparent background around a moving object. Hence, Stickers have the power to enhance your storytelling in videos, images, or online conversations.
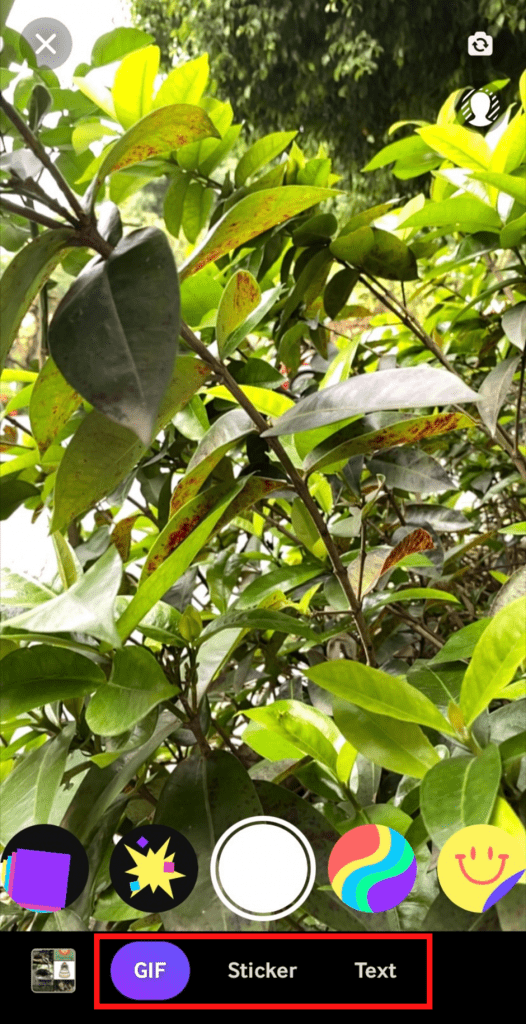
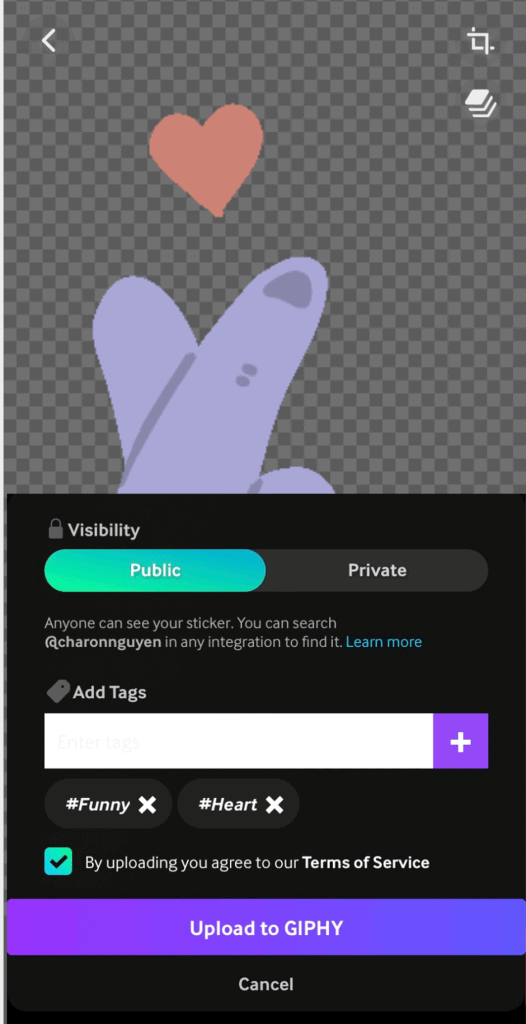
First, you need to register a new account and submit an application form to be a Brand or Artist on GIPHY. Then, tap on the “Create” button on the top-right corner of the homepage of GIPHY.com. You’ll be redirected to the recording screen, where you can create or upload GIFs, stickers, and texts. It’s pretty easy to make a GIF and a sticker as GIPHY.com provides a comprehensive tutorial to show you how. However, please keep your Sticker transparency over 20% in the first frame to get it approved. Then, select the “Arrow” button at the end of the screen to set the “Visibility status” and add tags to your Sticker before uploading. Once the uploading process completes, your GIF or Stickers will appear on the “Upload” section of your GIPHY profile.
Step #2: Create a New Video or Upload an Existing One to TikTok
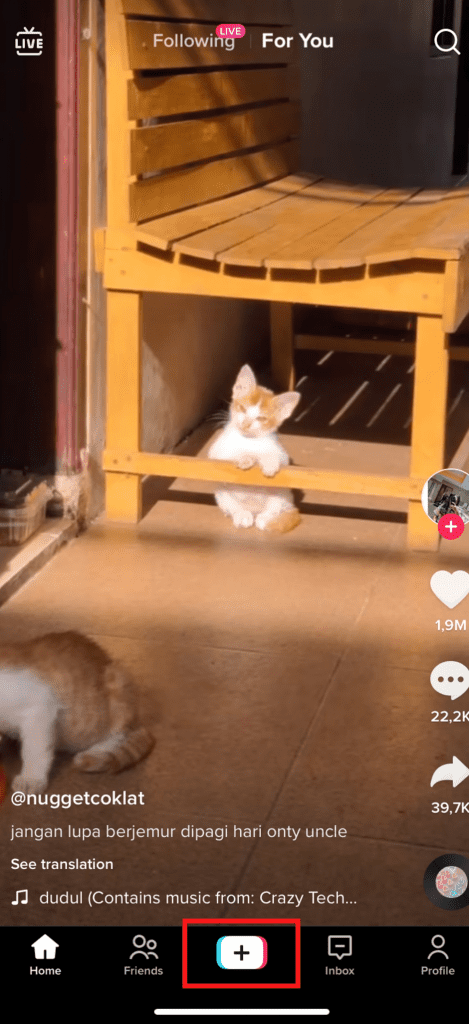
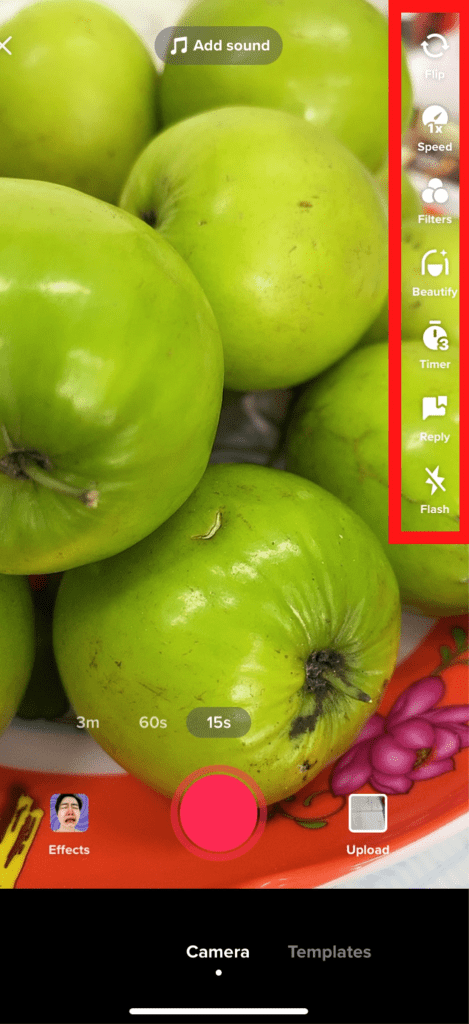
Moving to the next part, you’ll have to upload a video to TikTok. You can record a new clip or select a ready-made one from your phone library. From your TikTok homepage where tons of videos are playing, select the plus (+) icon at the footer navigation bar. Then, TikTok will redirect you to the recording screen. Below are several editing features displayed in the right corner before you manually record a video:
Flip: your camera will change from the front-facing to selfie mode and vice versa.Speed: this allows your video to be recorded in slow motion or time-lapse.Filters: this feature lets you apply preset looks to your video and change its color entirely.Beautify: this is a great effect for beauty fanatics with smooth skin, face slimming, etc.Timer: it helps you set a countdown before recording as well as the length of the clip in advice.Reply: this feature enables you to reply to a comment by a video.Flash: this option helps you improve the lighting quality, especially in dark recording conditions.
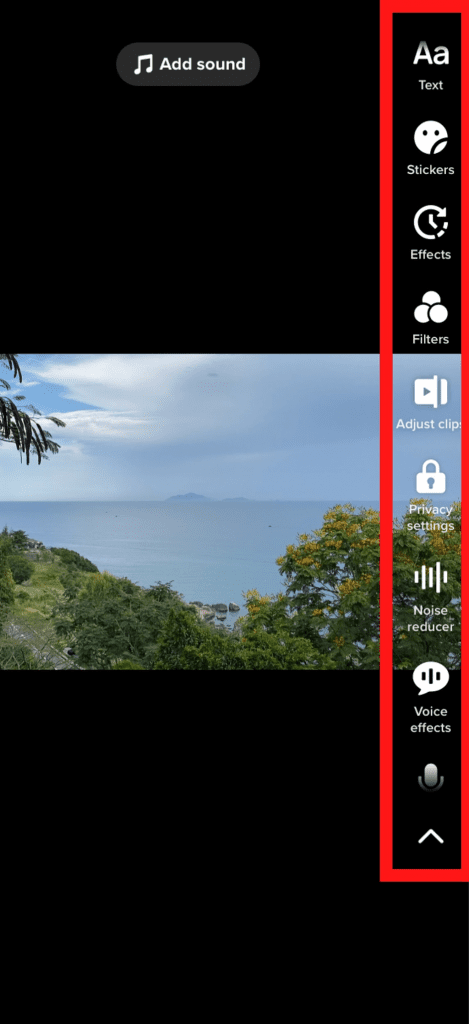
Simply press the red round button at the bottom to start recording and press it again if you want to pause it. Select the “Tick” icon if you’re satisfied with the video. For those who want to upload an existing clip to TikTok, choose “Upload” next to the Record icon. After that, pick the clip from your video collection. Once your video is prepared, TikTok will provide you with some additional features as follows:
Text: you can add texts to your video and change text style, position, size, color, and background color.Sticker: this allows you to insert animated stickers into your video. We’ll explain more about this in the next section.Adjust clips: it modifies the length of your video clip.Privacy settings: show who can watch your video and who can comment on your video.Noise reducer: it lowers the background noise so that the voice of your video is easier to hear.Voiceover: this allows you to insert your voice after recording the video.Voice effects: change the tone of the original voice to Chipmunk, Male voice, etc.Enhance: this effect increases the brightness of your video to make it more smooth and dreamy.
Don’t hit “Next” to publish your video because you still have one important task: adding your own GIF Stickers to TikTok.
Step #3: Add Your Own GIF Stickers to the TikTok Video
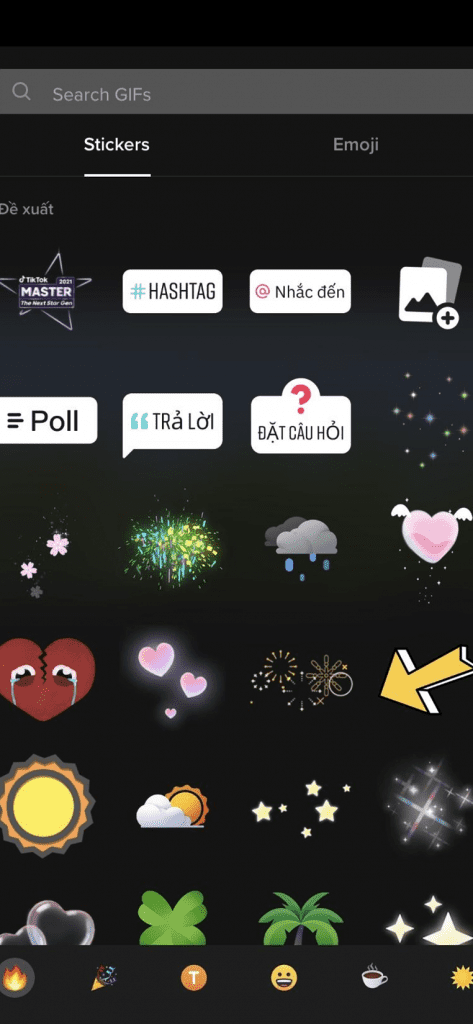
Now, let us show you the “vedette of our show”: adding your own GIF Stickers to TikTok videos. After creating or uploading the video, hit the “Sticker” option on the right side of the screen. Here you’ll see a variety of GIF Stickers from GIPHY.com. TikTok suggests a wide range of trending GIF Stickers that are commonly used recently. In case you want to use your own ones, type “@” + “your GIPHY username” on the searching bar. Then, pick suitable Sticker(s) that support the content of your video. Once selected, the stickers will immediately appear on your video. Most importantly, TikTok allows you to adjust the size and place the stickers wherever you wish.
Step #4: Post the Video
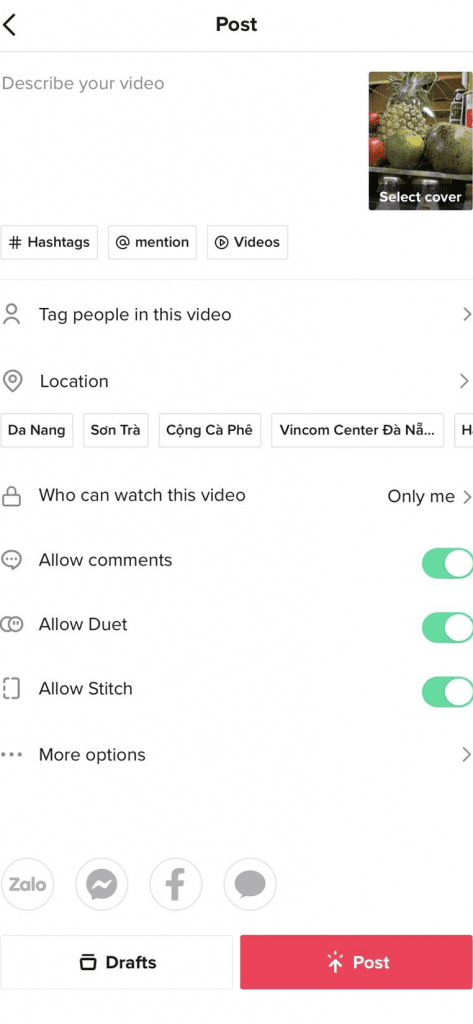
In this step, please hit “Next” and move to the post’s description section. Now, think about a catchy caption and add some related hashtags. This enhances your video’s visibility and thus gets more followers. Besides, TikTok allows you to tag people in the video if your friends contribute to the clip. Plus, add the location where you record it so that other people can easily see your video when they search for this place. We hope that you’ll find it easier to add your own GIF Stickers to TikTok thanks to this article

